
A cut list is the bridge between a drawing and a pile of boards. Get it right and the saw runs straight through the job. Get it wrong and you find out when a carcass will not close, or when you are one board short on a Saturday. This guide walks through how to make one by hand, the mistakes that cost the most, and how Woodkraft does it for you.
What a cut list is
A cut list names every flat part in a job, one line each, with what the saw operator needs to cut it:
- Part name and cabinet: "Side, wardrobe 2" tells the workshop where it goes.
- Length and width: the size to cut, in millimetres. Length usually runs with the grain.
- Quantity: two sides, four shelves, and so on.
- Material and thickness: for example 18 mm white melamine board, or 18 mm MDF to be sprayed.
- Edges: which of the four edges get edge banding, and how thick.
- Grain: whether the part may be turned on the sheet or must follow the grain.
Doors, drawer fronts, backs and shelves all go on it. Bought items like hinges, runners and handles go on a separate hardware list.
Start from finished sizes
Work out each part from the cabinet's outside size and the way it is built. For an 18 mm carcass with sides that run full height:
- Sides: full height by full depth (less the back, if the back sits in a groove or on the face).
- Top and bottom: cabinet width minus two side thicknesses. A 600 mm cabinet gets a 564 mm bottom.
- Fixed shelves: the same width as the bottom. Adjustable shelves are usually 1 to 2 mm narrower so they drop in easily.
- Doors: the opening plus the overlay, minus the gaps between doors (often 2 to 3 mm).
Write down the finished size first, then work out the saw size from it. Mixing the two on one list is the most common source of parts that are a few millimetres out.
Take the edge banding off
If a part gets 1 mm or 2 mm edge banding, the board must be cut smaller by that amount on each banded edge, or the finished part comes out oversize. A shelf that should finish at 564 × 550 mm with 2 mm banding on one long edge is cut at 564 × 548 mm.
Thin 0.4 mm banding is often left on the size. If your edge bander pre-mills the edge, check how much it takes off and allow for that too. The rule is simple: decide once how your workshop works and apply it to every line.
Mind the grain
Wood veneers, woodgrain melamine and plywood have a direction. Doors and visible sides should all run the same way, normally vertical. Mark those parts "follow grain" so nobody turns them on the sheet to save space. Plain colours and MDF can be turned freely, which usually saves board.
Fit the parts on the boards
Most boards sold in Ghana are 2440 × 1220 mm (eight feet by four). To work out how many to buy, lay the parts out sheet by sheet:
- Take a few millimetres off each edge of the sheet to clean up damaged factory edges (a 10 mm trim is common).
- Allow for the saw blade between every cut. A panel saw blade removes about 3 to 4 mm.
- Place the biggest parts first, then fill the gaps with smaller ones.
- Keep cuts that run right across the sheet where you can, because that is how a panel saw works.
Dividing the total area of the parts by the area of a sheet always gives too few boards, because nothing fits perfectly. Plan on some waste, and keep the good offcuts for the next job.
Common mistakes
- Forgetting the back: backs, rails and plinths are easy to leave off.
- Banding twice: taking the banding off a size that already had it taken off.
- Doors cut before the carcass is checked: cut doors last, once the carcass sizes are confirmed.
- No part labels: a stack of unlabelled parts slows assembly and hides mistakes until the end.
- Hand copying: every time a list is copied by hand, a number changes.
How Woodkraft makes the cut list
In Woodkraft you design the room or the cabinet, then press Send to cut list. Every board, edge and fitting goes across in one click, with the edge banding already taken off the saw sizes.
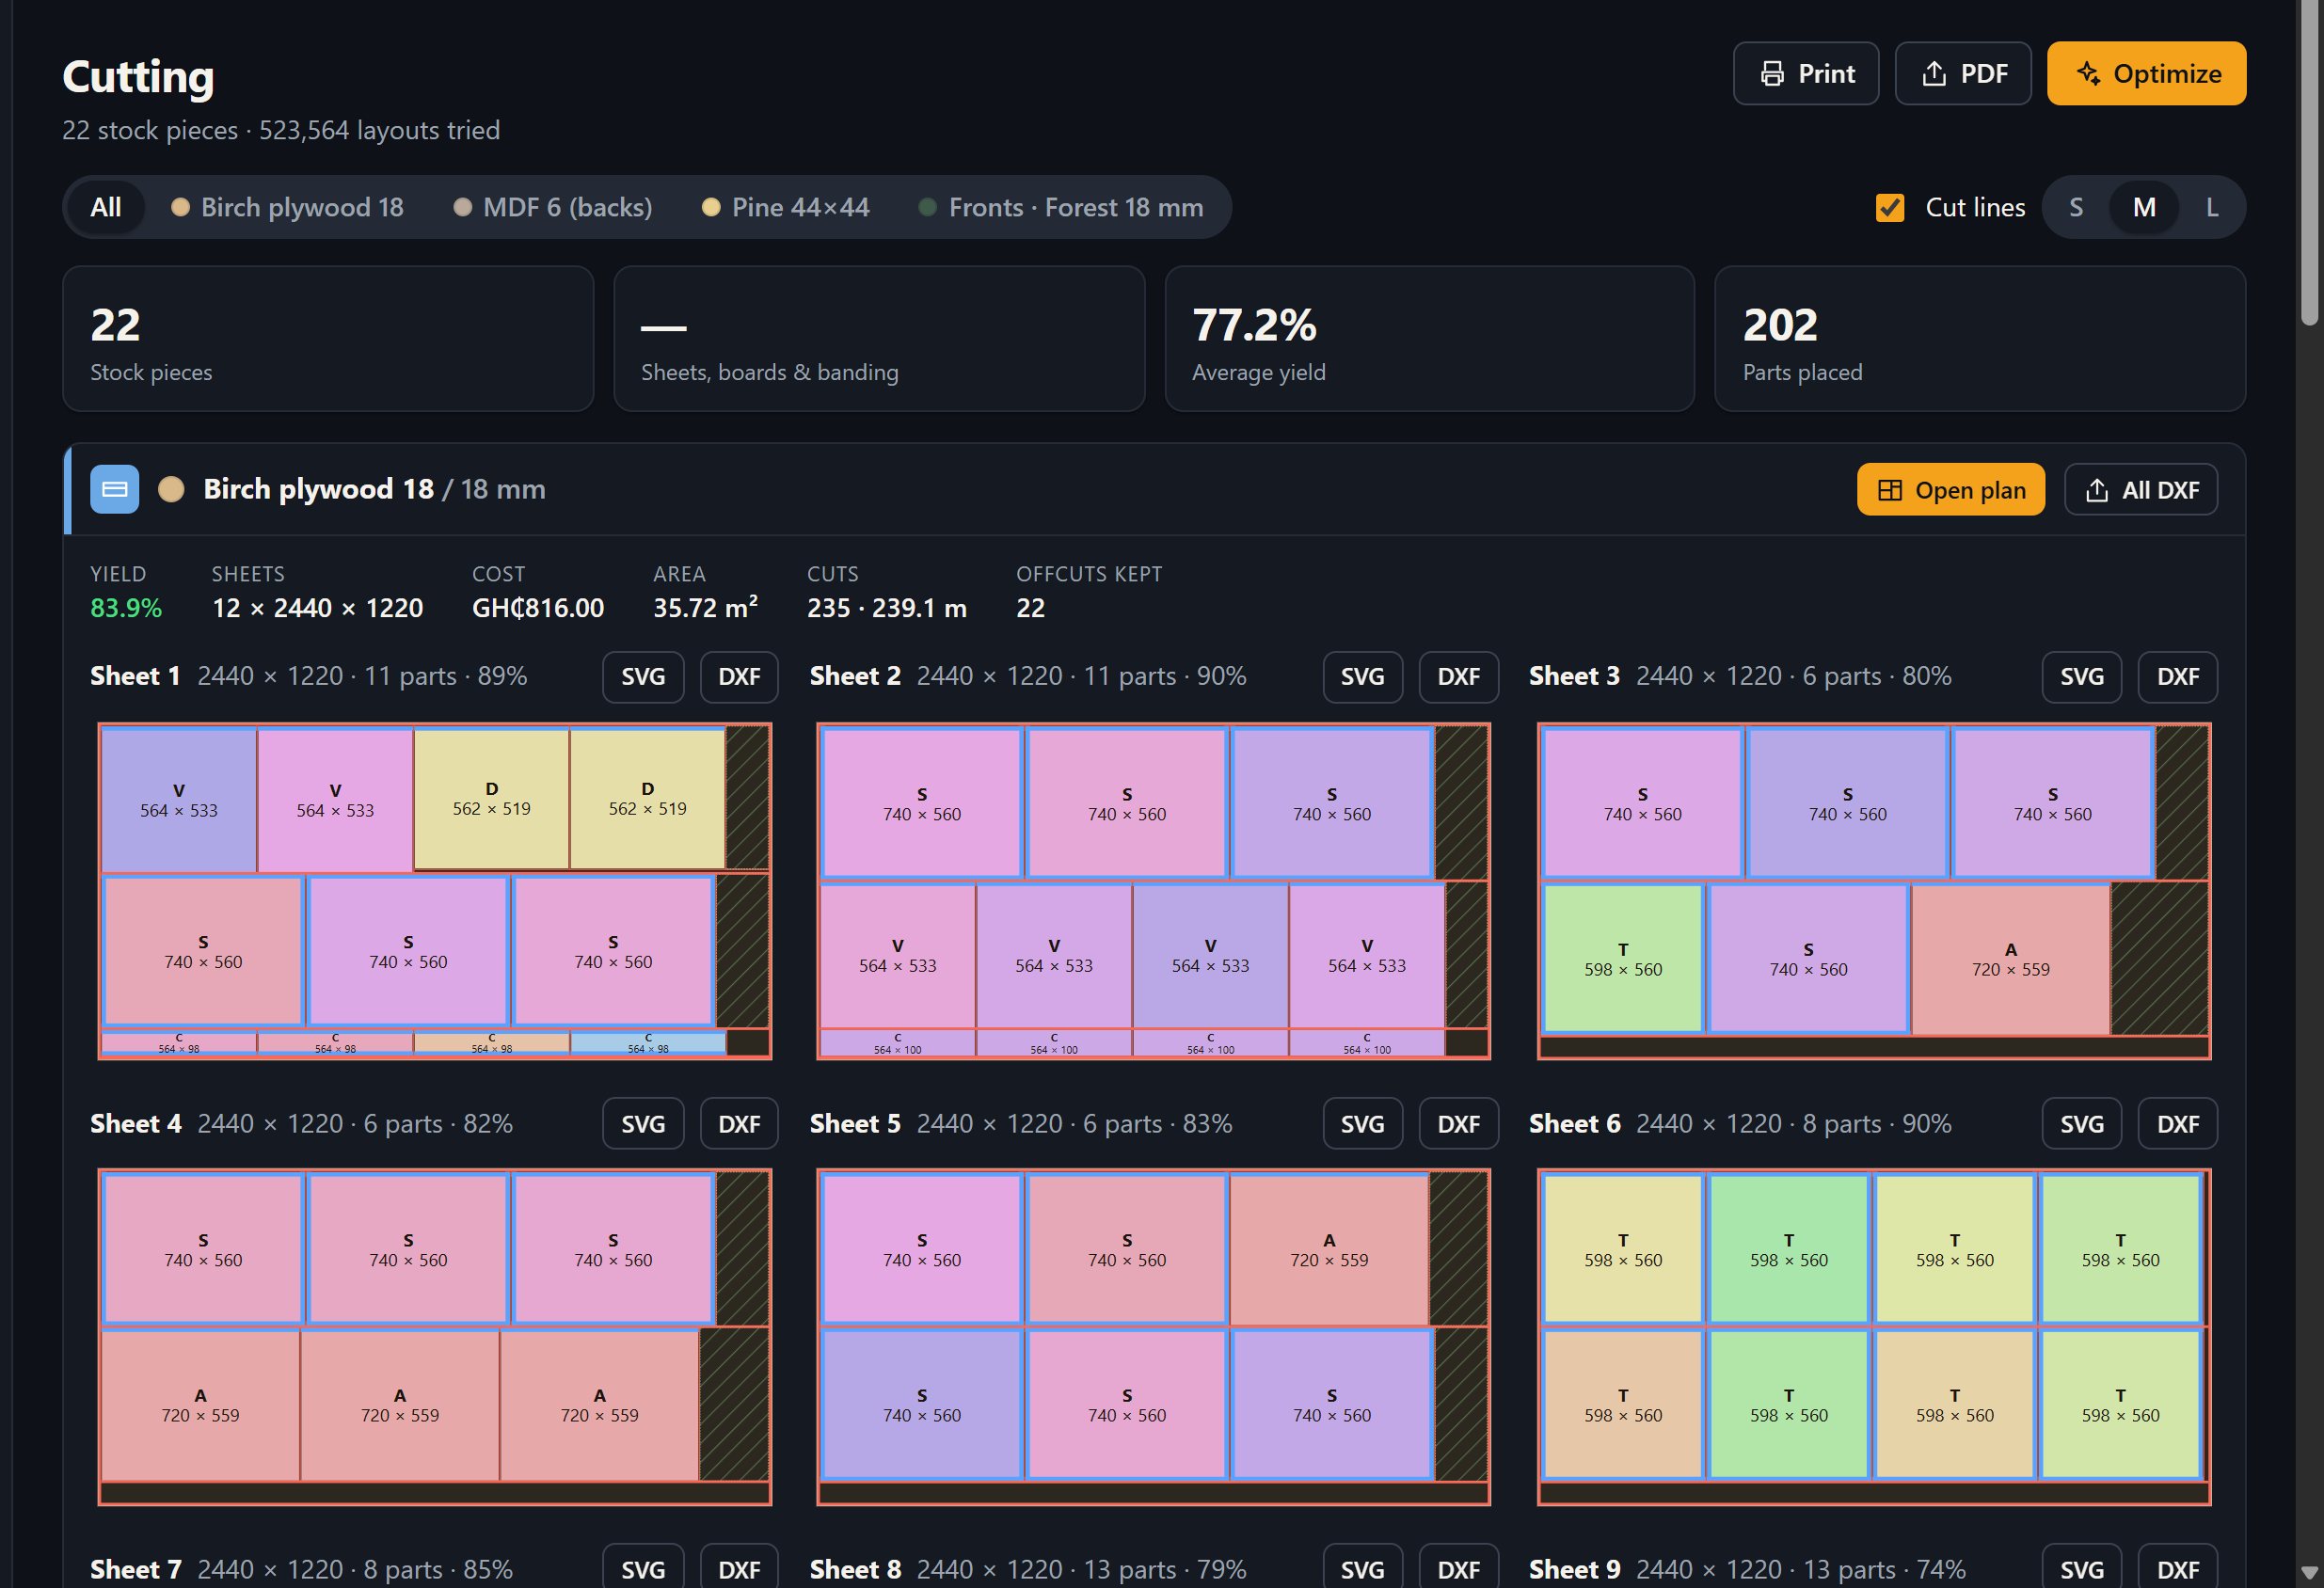
Open Cutting and press Optimize. Woodkraft tries thousands of layouts, keeps the best one, and respects the grain of each material. The blade width (3.2 mm to start) and the edge trim (10 mm) are settings you can change to match your saw. Good offcuts can go on the offcut shelf, and the next job uses them first.
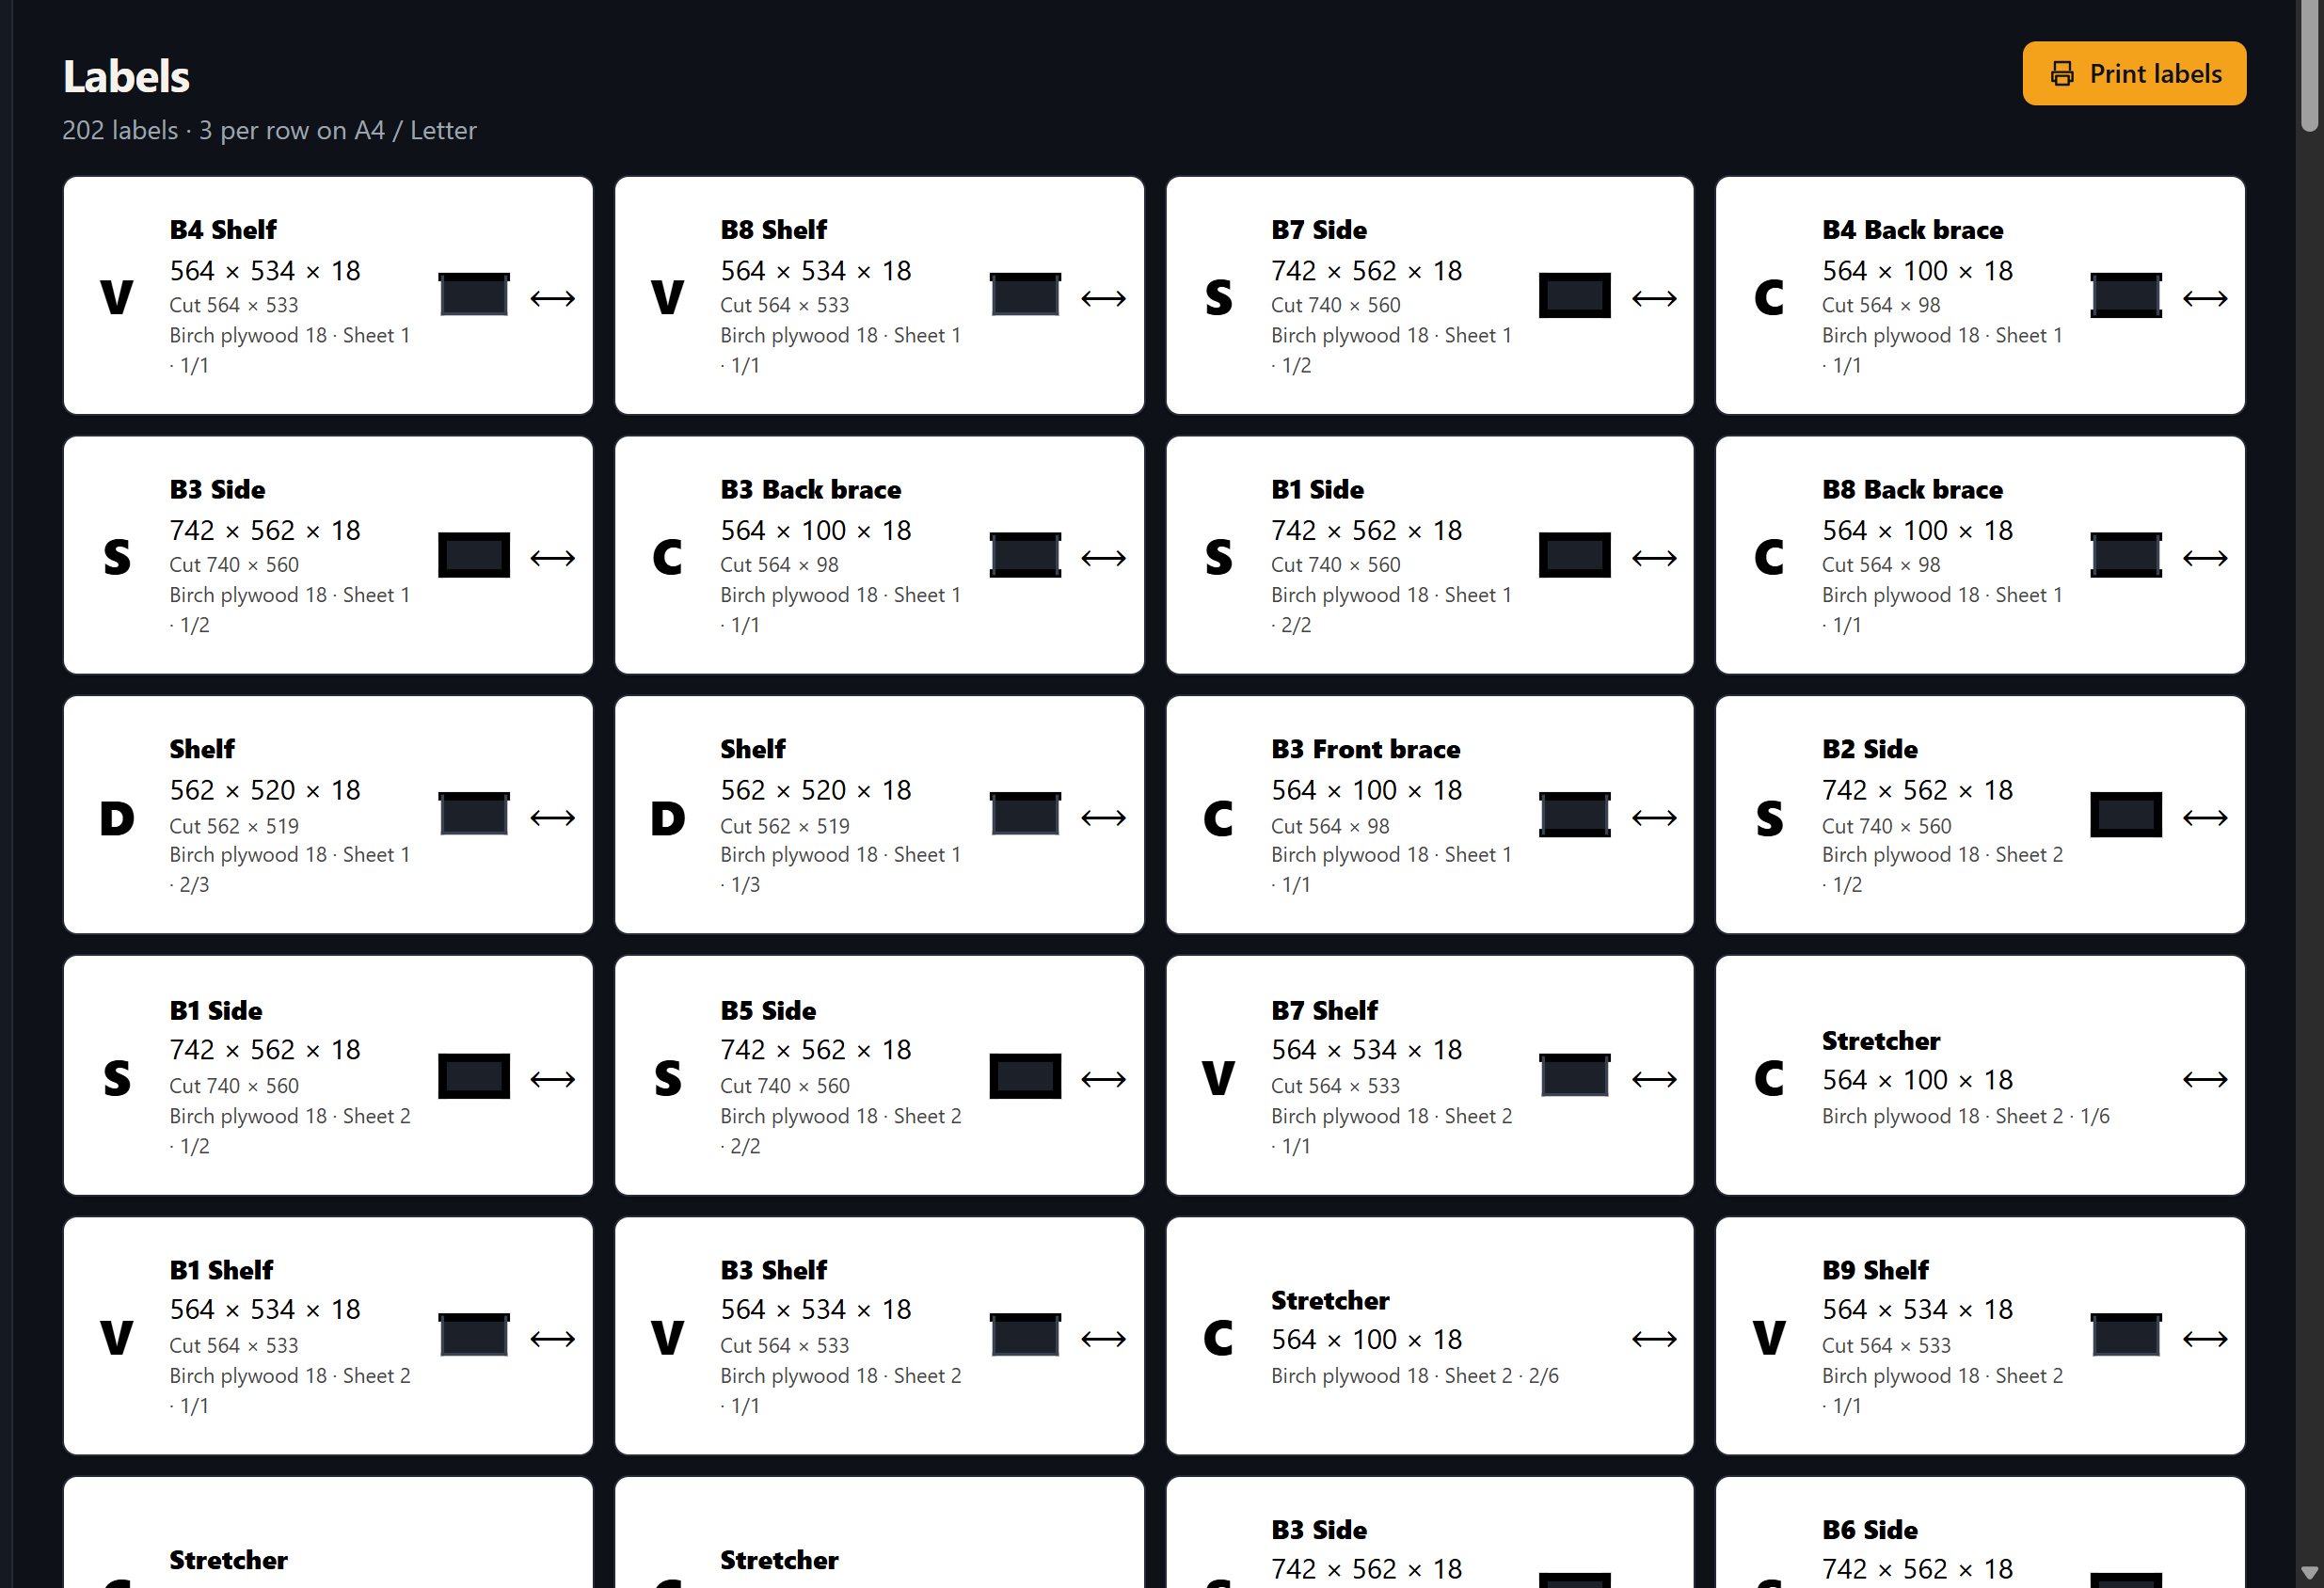
From the same list you get part labels, CNC files if you have a machine, and a quote priced from the real number of boards rather than a guess.